Added to the collection: Power Mac G4 and other accessories

PowerMac and iMac

These past years, my vintage collection has expanded mostly thanks to generous — sometimes very generous — donors. These last additions, instead, came from a ‘rescue mission.’ It’s been a while since I did my last, and I had missed the fun. Thanks to a valuable tip from my brother-in-law, I learnt that a local design studio was getting rid of a few vintage Macs and assorted accessories and peripherals, and they were basically telling people on social media to come and get them.

If you’re a regular reader of this site, you’ll probably understand how I felt. I couldn’t pass up such an opportunity. From the photos the design studio put online, I knew I couldn’t take much with me (there were bulky printers, several beige desktop Macintosh G3 machines, a couple of older Power Macintosh 7300, an 8600, and a few graphite Power Mac G4s, plus three boxes of miscellaneous things covered by an intricate web of Apple ADB mice and SCSI cables), so I resolved to look for useful peripherals for my data retrieval service, and to rescue at least one of those Macs. I wish I could have taken more stuff away with me, but unfortunately I just don’t have the space.

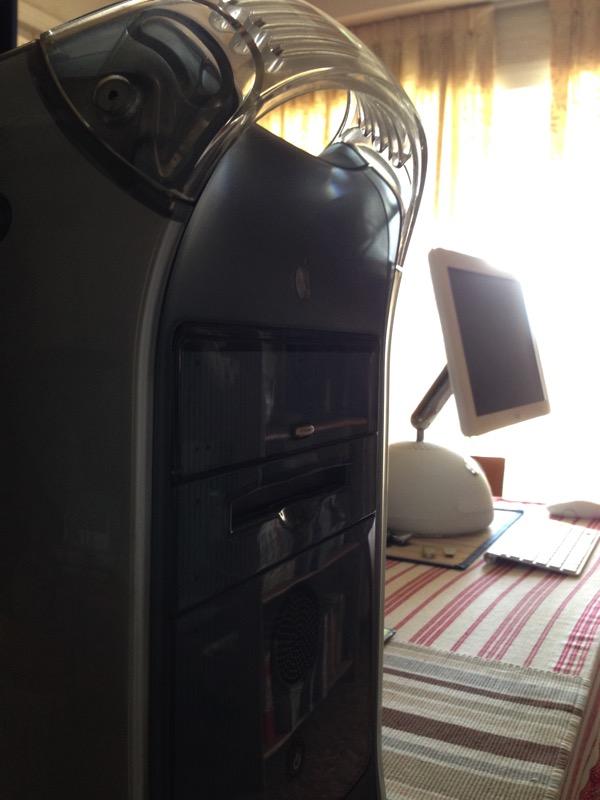
As much as I love older machines, my interest was piqued by those graphite Power Macs. When I got there, I noticed that one of them had already gone. The remaining two were very similar, but one had an internal ZIP drive, the other did not. I have several ZIP disks, plus my PowerBook 5300 and PowerBook 1400 both have ZIP modules, then I have two other external ZIP drives — one SCSI, one USB — so ZIP disks are often a quick way to pass files among my vintage Macs. So, this Power Mac G4 with an internal ZIP drive was already drawing my attention. Still, I wanted to check the specifications of both Macs to see which was the better machine. Thankfully, Apple has this nice habit of indicating a Mac’s base configuration either on a label or by printing it on the computer itself. I wasn’t in a comfortable position, crouched behind the Power Macs, trying to read the tiny labels, but I managed to catch a 400 MHz on the label of the ZIP-less Power Mac, and a 500 MHz on the ZIP-equipped one, so I chose the latter.

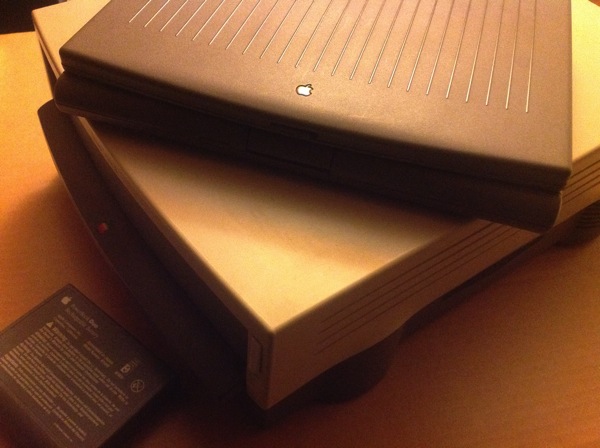
Then my attention turned to the various accessories scattered nearby. There were a couple of Apple Extended Keyboard II keyboards, so of course I picked up one:

AEKII

I already have one, but it has the older QZERTY Italian layout, which I find particularly difficult to adjust to. This has the equally older Spanish layout, but it’s QWERTY, and shares more keys in the same position as the US/UK/ITA Pro layout I’m more accustomed with. (I still haven’t cleaned the keyboard thoroughly, but it’s not bad after a first pass, and believe me, you didn’t want to see a photo of its original condition!)

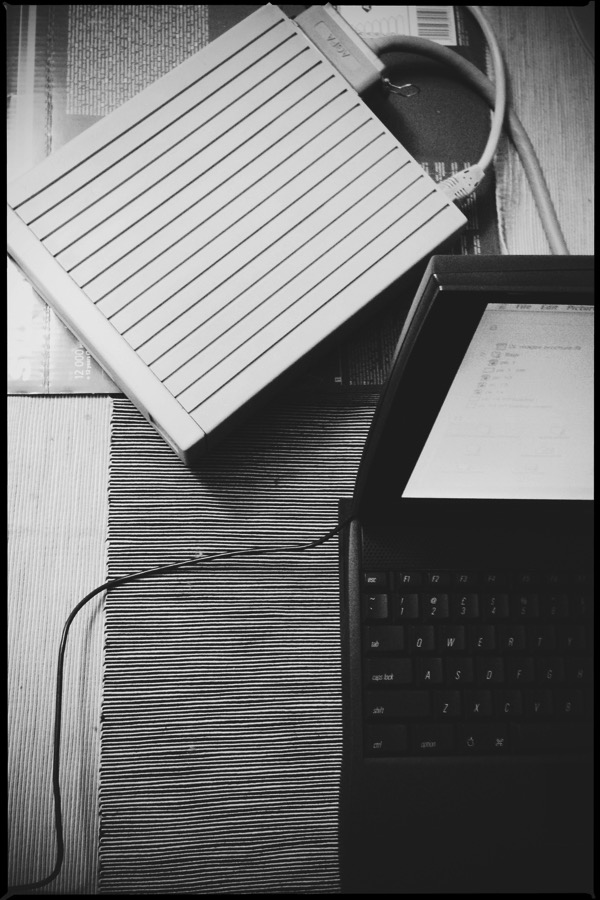
Next up, another very interesting peripheral:

Fujitsu MO drive

It’s not a bulky floppy drive, but a 3.5″ Fujitsu 230 MB SCSI Magneto-optical drive. There was a SCSI cable in good condition attached to it, plus that SCSI passthrough terminator you see in the photo. I took the whole package.

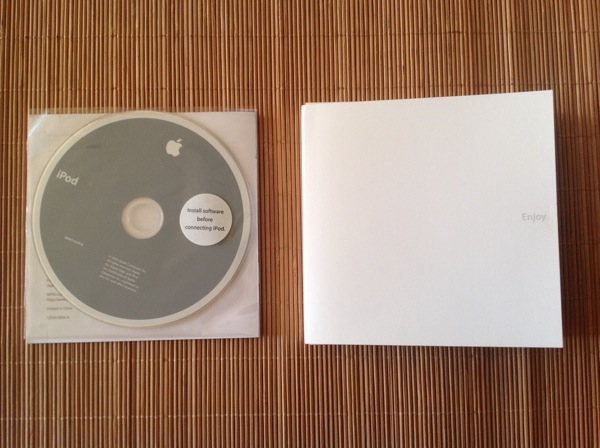
Last month I thought to myself, It’s a pity I don’t have a USB floppy drive, it could be useful for quick data retrieval without having to take out a floppy-equipped Mac every time I need to read one. Guess what I found among the tangle of SCSI cables:

USB floppy drive

It is the typical ‘Made in China’ unbranded affair, but I briefly tested it, and it works. So no complaints here.

I didn’t want to overstay my welcome. There were other things I could have picked up — keyboards, mice, cables — and other things that would have needed further inspection and more time. Then there was at least one thing I regret not taking: a 17-inch CRT Apple Studio Display, but I really really have no space for such a cumbersome item.

Studio17 side

If you’ve never seen one in person, you can’t imagine how imposing this thing is. To give you an idea, it’s bigger than an iMac G3, and is closer to an eMac in size and bulk. It would have made a nice companion for the Power Mac G4, but I guess I’ll look for the flat-panel 17-inch Studio Display, certainly more manageable.

Just as I was leaving, beneath a pile of other non-Mac equipment, there was this nice-looking cassette deck, a TEAC V-210C, manufactured around 1988:

TEAC cassette deck

I still have hundreds of tapes, and my Sony stereo cassette deck broke down a couple of years ago, leaving an old Aiwa walkman as my sole means to listen to cassette tapes. I asked the guys of the design studio whether it worked or not and they told me something along the lines of Who knows, but take it home and find out yourself, heh heh. So I did. And it works!

More about that Power Mac G4

IMG 1173

Above I said that I chose what appeared to be the better Power Mac by having a cursory glance at the label with the base configuration attached on the back of the machine. Once home, I examined it more carefully, and I was pleasantly surprised by a little detail I’d missed. The label actually says: 500 MHz / MP / 1M CACHE / DVD-V / 256MB SDRAM / HD 40G / 56K MDM. That “MP” stands for Multi Processor, making this a Dual 500 MHz Power Mac G4!

Another bonus: it actually came with 640 MB of RAM, and equipped with a SCSI card as well, which never hurts. The Mac was apparently last used in December 2008 and contained three user accounts which were basically empty. I had to use the Mac OS X Tiger DVD to boot the Mac and enable the root account, which I used to inspect the user accounts and then delete them. Among the software goodies: a full installation of Adobe CS3, plus FreeHand, StuffIt 12, and NeoOffice.

I was happy to find four 512 MB RAM sticks in my stash, which happened to be the exact type supported by this Power Mac, and voilà — I have brought it to the maximum RAM supported: 2 GB.

About this Mac  PMG4

The Mac came indeed with a 40 GB IBM Deskstar hard drive, which I discovered to be a 7200rpm drive. A quick check with Disk Utility didn’t find any problems with it. It’s rather fast, although a bit on the noisy side. The Mac also has a Combo optical drive: it reads CDs and DVDs, and writes CD-Rs and CD-RWs. My initial tests show that it works reliably when it comes to reading discs, not so much when writing them. But what I’m most bummed about is the ZIP drive, which doesn’t seem to work. System Profiler sees it, the unit appears to work when inserting disks, but nothing happens afterwards, and disks (even formatted, known-to-work disks) aren’t mounted on the desktop or detected by Disk Utility.

I thought it was a matter of drivers, but Mac OS X Tiger doesn’t need them to read ZIP disks from an internal drive. I thought it was a matter of jumper configuration on the back of the unit, but I’ve read that its current jumper-less configuration is the right one. I’ve seen units like this go for €25-30 on eBay; I also have an excellent DVD-RW/CD-RW drive salvaged from another computer — I might replace both in the future and have a fully-working Power Mac G4. Still, I really can’t complain. The Mac works very well, and the combination of dual G4 processors, 2 GB of RAM, and a 7200rpm drive makes for a surprisingly snappy machine overall. TenFourFox is quite responsive, possibly even more than under Mac OS X Leopard on faster machines. This is the Gigabit Ethernet Power Mac G4, so network transfers are very fast as well. This Mac has space for another two internal hard drives, so I’m thinking it’s a good candidate to act as a home server of sorts. I can’t wait to put it through its paces.

Everything else works

The Apple Extended Keyboard II only has one unresponsive key, but I’m reserving judgment until I have a chance to clean it thoroughly (it’s very dirty under the keys). The USB floppy drive works. The Fujitsu Magneto-optical drive works too: I was donated a 230 MB magneto-optical disk and last night I was finally able to access it on the PowerBook 1400:

MO drive and PowerBook 1400

And, as I already mentioned above, that TEAC cassette deck works as well. I’m very happy to be able to listen to tapes (and old mixtapes) again on my hi-fi stereo.

In conclusion, I wish I could have rescued more stuff (oh, that Studio Display!) but I’m quite satisfied with what I ended up selecting. The Dual 500 MHz Power Mac G4 is the most powerful machine of all those that were up for the taking, so… mission accomplished nonetheless!

The strange case of the resurrected drive

When you have a few different vintage Macs to maintain, and not enough space to keep them all set up all the time, you have to perform routine check-ups to see if everything still works or if some Macs have started showing signs of old age and need attention.

A few days ago I reconnected everything in my Power Macintosh 9500/132 system after borrowing display, keyboard and trackball for other projects. The original setup of this Mac included two internal hard drives, a 2GB Seagate and a 540MB Quantum Lightning, the latter being the startup volume. After acquiring an external SCSI 4GB hard drive, I even managed to enjoy a triple-boot system for a while, with Mac OS 9.1, Rhapsody Developer Release 2, and Mac OS X 10.2 Server (installed with the help of XPostFacto).

Sometime around 2012, however, both internal drives died at the same time while trying to boot the Mac. After repeated, unsuccessful attempts at retrieving data, I took them out of the machine and, in turn, put them in an external enclosure to see if I could mount them on other vintage Macs and perform further diagnostics. I soon realised that the 2GB Seagate was a true goner after hearing the kind of mechanical noises it made after powering it up. The other drive was just silent, it didn’t even spin up. Since I didn’t know where to drop it at the time, I ended up putting it back inside the Power Macintosh 9500. The surviving drive was the external 4GB unit running Mac OS X 10.2 Server. I deleted the installation and reinstalled a fresh copy of Mac OS 9.1, and that became the startup and only volume for this Mac.

Remember, this was happening four years ago. In the following years, I’ve used the Power Macintosh 9500 on several occasions. The 540MB internal hard drive never gave the slightest sign of life, to the point that I genuinely forgot about it.

When I switched on the Mac a few days ago, it had problems booting, and appeared to get stuck at the ‘Happy Mac’ screen. It also sounded noisier than I remembered. Then I glanced at the external drive enclosure and noticed that it was turned off. So why was the Mac trying to boot anyway? And where did that noise come from? And then I remembered the dead internal drive… I switched on the external drive, force-rebooted a couple of times, and finally the Power Macintosh completed the startup process successfully. After installing a newer version of the excellent FWB Hard Disk Toolkit, here’s what it presented me after an initial scan:

#alttext#

The 540MB Quantum Lightning drive was detected on the SCSI chain. I selected it, told Hard Disk Toolkit to mount it, and it appeared on the desktop a few seconds later. Then I ran Disk First Aid. It reported minor problems that were promptly repaired. Finally — and still quite amazed — I proceeded to browse the contents of the ‘lost’ drive and everything was there, just like four years ago. I have booted the Power Macintosh 9500 several times over the past few days, and now the internal drive I thought dead years ago consistently mounts on the desktop and appears to be working properly.

This is not the first time in my long experience when a drive or peripheral goes back to functioning after an apparent death, but it is definitely the first time that such resurrection has happened four years later. I still can’t believe it.

Turning my third-generation iPod into a flash-based device

iPod 3G in box
 
After successfully upgrading my iPod mini, replacing its failed 4 GB MicroDrive with an 8 GB CompactFlash card, I wanted to try to do the same thing for my older third-generation iPod. It’s my very first iPod, a 10 GB model purchased in 2003, and it has a great deal of sentimental value to me. Sadly, its internal hard drive stopped working sometime in 2009, and I never got round to fix it. By 2009 I had many other alternatives to listen to music on the go — I had the iPod mini, an iPod shuffle, and an iPhone 3G — so what was once my only iPod was now left in a box with its accessories. Every now and then I would take it out to recharge the battery (while feeling guilty because I was neglecting it), and every now and then I would search online for a new Toshiba hard drive of bigger capacity, but prices have always been a bit too high for my tastes. But recently I started considering the CompactFlash route, and when I stumbled on a very cheap 1.8-inch drive to CF adapter on eBay, I decided to go for it.

What follows is my personal experience, not a proper guide, so your mileage may definitely vary.

Disassembling the iPod to remove the hard drive

I followed the excellent iPod 3rd Generation Hard Drive Replacement guide by iFixit. Opening the iPod was hard and cost me lots of patience, attempts, a few tiny scratches on the iPod’s white surface, and a moment of panic when I thought I had broken something inside with the putty knife I used to separate the plastic front from the metal rear of the iPod. Follow the guide faithfully and pay special attention to the warning at Step 7 regarding the disconnection of the internal headphone jack connector.

Inserting the CompactFlash card

Unlike the iPod mini, for which it was simply a matter of swapping the MicroDrive with a CF card, in this case a 1.8-inch drive to CF adapter is needed. This is what I found and bought on eBay for a few Euros:

CF adapter

At first I thought I’d have trouble inserting it the right way, but I soon found out that there’s really no risk of making mistakes once you examine how the original hard drive connects to the drive connector. A small obstacle in my path at this point was a small plastic protrusion that enters a hole in the hard drive plastic edge near the 50-pin connector (evidently to help you insert the drive in the correct orientation and to align the pins properly). When I pushed the CF adapter down, this small protrusion prevented one edge of the adapter’s connector to insert all the way down. So I clipped it with a pair of small scissors, just enough to eliminate the interference.

Then I slid the CF card in. I was satisfied with the price and quality of the 8 GB SanDisk Ultra card I got for the iPod mini, so I purchased a 16 GB card of the same brand and model.

iPod with 16 GB Card

Connecting to the Mac and iTunes

Dealing with the hardware for this kind of upgrade hasn’t been particularly challenging. But as I was browsing the Web for information in the past weeks, I stumbled on a few different horror stories of third-generation iPods being especially fussy with this upgrade, some not recognising the card, some not being recognised by iTunes, some needing firmware modifications to work, and so on and so forth. I was ready to face troubles and complications, so after inserting the CF card and connecting the drive and headphones connectors, I didn’t close the iPod just yet.

Now, this generation of iPods was the last to be able to connect to Macs and sync with iTunes over FireWire. And being the first iPod with the long-lasting 30-pin Dock connector, it could effectively connect to Macs via FireWire and to PCs (and Macs) via USB. Tempted as I was to connect it to my Intel MacBook Pro over USB, I instead connected it to the same-vintage iMac G4 over FireWire. Like I did with the iPod mini, I just put the CF card inside without formatting it, assuming it was ready to use with a DSLR camera (therefore being preformatted in FAT-32 format).

Lo and behold, iTunes 10.6.3 on the iMac instantly opened and recognised the iPod and the CF capacity, but not the Serial Number and the Software Version, though it prompted me to update, telling me that “A newer version of the iPod software is available (version 2.3)”. (Also note “Format: Windows”)

IPod recognised 1

And the quirkiness begins

Naturally, I click on Update, and the (very fast) update process begins. iTunes downloads the iPod software version 2.3, copies it on the iPod, then — a typical final step in any iPod update — the iPod disappears from the iTunes sidebar, reboots, and remounts. iTunes warns about this with a dialog box that auto-dismisses itself after a few seconds. But the iPod doesn’t reboot. On the iPod’s display the message “OK to disconnect” appears. So I disconnect, then reconnect the iPod to the Mac. iTunes opens and warns that there’s an iPod with a corrupted drive connected (Uh-oh!) and offers to restore it and update the software. I let iTunes do its thing, and I’m presented with the same situation as before: the iPod should reboot (iTunes is telling me so) but it doesn’t. On the display, again, “OK to disconnect”.

I stop and think: evidently the iPod isn’t able to complete the update process by rebooting, so this time instead of disconnecting it, I manually reset it (by holding the Menu and Play/Pause buttons). It’s the right move, because after rebooting, under the Apple logo a progress bar appears. And since there’s now a CF card inside, the firmware update proceeds at an amazing speed. After 5 seconds, the Language Setup screen appears and the iPod is fine. I quickly go to Settings > About and all information shows up correctly: iPod name, capacity, available space, Software Version, Serial Number and Model Number. Success! But…

But now iTunes doesn’t see the iPod.

I reboot the iPod, nothing. I reboot the iMac, nothing. I disconnect and reconnect the iPod, nothing. Then I remember something I read on the Web… someone complaining that after the CompactFlash upgrade their iPod could only sync with iTunes via USB. So I take a USB cable and connect the iPod to the iMac via USB. iTunes opens and immediately recognises the iPod:

IPod recognised 2

Note that now everything appears correctly, and the Format is Macintosh.

Since I don’t have music yet on the iMac, before closing the iPod for good, I want to try copying some music on it, and to check if everything is okay when plugging the headphones. So I connect it to my MacBook Pro and — whew — no problems with the latest version of iTunes. As predicted, transferring music to the flash-based iPod is really fast, and once I plug in the first pair of earphones at hand, I can hear music just fine. However I notice an interesting detail: the iPod is not charging despite being connected to a high-powered USB 2.0 port directly. Quite baffling. I disconnect it, take a FireWire cable and connect the iPod to the G4 Cube. iTunes doesn’t open, but now the iPod is charging. So, was what I read in that forum true then — that after upgrading a third-generation iPod to use a CF card, it can only be synced over USB and only be charged over FireWire?

At this point I’m still utterly puzzled by the initial fact that, after updating the iPod to the latest software version, it stopped being recognised by iTunes over FireWire and just developed this behaviour. It’s not logical. In the end, what I’ve done is just replacing the hard drive with another ‘drive’, only it has flash storage. And then I have an idea. I connect the iPod to the MacBook Pro again over FireWire (like this: [iPod] → [30-pin to FireWire 400 adapter] → [FireWire 800 to FireWire 400 cable] → [MacBook Pro]). As predicted, the iPod starts charging but iTunes doesn’t recognise it. Then I put the iPod into Disk Mode manually. With this iPod, the procedure is as follows: you toggle the Hold switch on and off (set it to Hold, then turn it off again), you press and hold the Play/Pause and Menu buttons until the Apple logo appears, then immediately press and hold the Previous and Next buttons until the Disk Mode screen appears. (Source: Apple Knowledge Base).

As soon as the iPod enters Disk Mode, it gets recognised by iTunes as usual and it keeps charging!

And then another quirky thing happens: transfer speeds when copying music on the iPod are really slow. Not exactly USB 1.1 slow, but certainly slower than USB 2.0 or FireWire 400. I still haven’t had time to figure out this particular detail, and if I find something I’ll update this article.

Other minor quirks noticed so far

  • The iPod freezes every time I eject it from iTunes after syncing. For both iTunes and the Finder, the iPod has been ejected correctly, but the iPod’s display remains stuck on the “Do Not Disconnect” screen. Rebooting the iPod puts everything in order.
  • I’ve also noticed occasional hiccups: earlier today, I selected a song and playback wouldn’t start, as if I had pressed Pause right away. The whole interface was fully responsive and registered every button press, but songs wouldn’t start playing. Putting the iPod to sleep and waking it again solved that.
  • The battery icon appears to have become rather unreliable at displaying exactly how much charge there’s left (more on this below).

Battery life

When it was a new model in 2003, this iPod had an advertised play time of 8 hours. I used it very often back then: 2003 to 2007 were the years of most intense use. Its hard drive failed gradually, and in the last weeks before finally stopping working, it got quite loud and sometimes copying music was painful, with intermittent transfer speeds, aborted copies, and so on. What I had started noticing in these circumstances was that the iPod got unusually warm, and that battery life had decreased dramatically. So I didn’t expect much when I started my test this morning after leaving the iPod to recharge overnight.

All in all I’m not disappointed. The iPod played continuously for just about three hours (backlight set to its minimum setting, 2 seconds; frequent interactions to change album and sometimes the volume). Honestly, I didn’t think it would last this long, considering the little 630 mAh lithium ion battery is 13 years old.

I also didn’t think it would last that long because the battery icon in the status bar completely misbehaved during my testing. When I disconnected the iPod after leaving it on the charger all night, I expected to see a full battery icon. Instead it was at about 60%, and during playback it trickled down to zero in about an hour. I thought that’s what little life there was left, but the iPod kept going, kept going, and played music for two more hours with the battery indicator completely empty.

Conclusion

Working iPod
Overall, I’m happy with how things turned out. The 16 GB CompactFlash card and the adapter didn’t cost much, and I spent about three hours between the ‘surgery’ and the tinkering. It hasn’t been a smooth ride like with the iPod mini, but at least I have revived this third-generation iPod, the very iPod that started the ‘digital music revolution’ for me. The iPod I used as a boot drive to work from my 12-inch PowerBook G4 when its internal hard drive failed and I was waiting for a replacement. I’m glad to see this old buddy playing music again after being left in a drawer for seven years. I still can’t fathom why this specific iPod generation is so fussy when you perform the CompactFlash upgrade, but these quirks I’ve encountered are nothing insurmountable. Ultimately what counts is that the iPod is perfectly usable (by the way, I also put it in Diagnostic Mode, and it passed all the tests), and the occasional hiccup can quickly be resolved with a reboot.

Extending the life of my iPod mini

#alttext#

#alttext#

#alttext#
Second-generation iPod mini — Introduced in February 2005, discontinued in September 2005

I own a second-generation 4 GB blue iPod mini that my wife passed to me when she was given a first-generation iPod touch in 2007. This iPod was never heavily used, and so it has remained fully operational — and with good battery life — for ten years, until sometime around October 2015 its internal hard drive (Hitachi 4 GB MicroDrive) failed while transferring some files. That saddened me. For some reason, despite the obvious convenience of using my iPhone to listen to music, I’ve always preferred the classic iPods for that activity. And my third-generation 10 GB iPod already died in 2008 (another hard drive failure), so now that my iPod mini stopped working too, I was left with just my iPod shuffle.

But while the easiest way to repair a third-generation iPod is to find another small-sized Toshiba hard drive for it, the iPod mini is notoriously easier to upgrade. These iPods used MicroDrives as internal storage solutions, and they are essentially small hard drives with the same dimensions (and most importantly, same connection) as CompactFlash cards. Which means that you can replace them with CompactFlash cards and enjoy a few advantages in return:

  • Today, you can easily find 8, 16, and 32 GB CompactFlash cards at reasonable prices. These cards are usually designed for heavy-duty usage with professional DSLRs.
  • They are long-lasting and offer much higher transfer speeds than the old MicroDrives.
  • Along with having more storage space (iPod minis originally came with 4 GB and 6 GB MicroDrives), CompactFlash cards do not have moving parts, which means better battery life.

The original 4 GB of storage space never felt really tight for me. While I do have a lot of music in digital form, I was never one of those people who have to copy their whole iTunes library on an iPod. I’ve always transferred just a small selection of favourite albums I love listening when out and about. I also didn’t want to get too big a CF card for fear of some unexpected incompatibility or similar issues, so when it was time to purchase a CF card to make the upgrade, I opted for a conservative 8 GB card:

#alttext#

Then I looked online for tutorials on how to proceed with the part replacement. The first stop was iFixit, of course, but this tutorial over at Instructables helped too.

The process isn’t extremely complicated, you just need to be a bit cautious, but the hardest step is definitely the first: removing the white plastic on the top bezel. If you look at the aforelinked iFixit guide, this step appears deceptively simple:

#alttext#
Source: iFixit.com

The problem is that the piece of white plastic is securely glued to the metal underneath, and it won’t come off easily. If you don’t proceed with patience and keep pulling up with a screwdriver, you’ll likely bend or break the plastic. Instead of a screwdriver, I used a small putty knife and tried to gently separate the white plastic from the metal casing. But the best tip to make this step even easier was given to me by Peter Emery on App.net (and it’s also suggested in the Instructables tutorial): use a hair dryer to soften the glue.

I know it sounds dangerous to expose the iPod to heat this way, but my iPod wasn’t harmed in any way. Just to be cautious, I used the hair dryer on the minimum setting and directed hot air on the top of the iPod in short bursts. After 5-6 times of gently prying and heating the plastic, it finally came off. It’s virtually impossible to avoid scuffing the white plastic top a bit — just think that, at least, you’ll have a working iPod later.

Same story with the piece of white plastic on the bottom (surrounding the 30-pin Dock connector), but in my case this came off much more easily. I didn’t even need to use the hair dryer. The iFixit tutorial has the best images, so follow the steps until it’s time to remove the MicroDrive. This tutorial is for a hard drive replacement, so once you get to Step 13, what’s left to do is to carefully remove the MicroDrive from its connector (get rid of the black tape and the blue bumpers), insert the CF card (make sure you keep the label on top — see Step 4 of the Instructables tutorial), and reattach the connector to the iPod’s motherboard. Another great advice is given here in the Instructables tutorial: You don’t need the rubber bumpers or tape but you will need a small piece of double sided foam tape to attach the card to the motherboard and keep it from rattling around inside your Mini. I suggest you follow it. The CF card is lighter and thinner than the MicroDrive — it will rattle if you don’t secure it.

The hardware part of the upgrade was done, but before reassembling everything, I wanted to make sure the iPod was properly recognised and formatted, so I connected the ‘naked’ iPod to my MacBook Pro and iTunes 12 immediately recognised it as a Windows-formatted 8 GB iPod mini. I tried copying an album to it, and the copy went smoothly and was insanely fast compared with the original MicroDrive. But since I read online that a good practice at this point is to do a full Restore using iTunes, that’s what I did, and iTunes 12.3.2 failed to complete the operation, throwing a ‘1430 error’. This Apple Support article (unsurprisingly) wasn’t really helpful. The solution was connecting the iPod to my PowerBook G4 with Mac OS X Leopard and iTunes 10.6.3, which correctly recognised and restored the iPod right away and without problems.

#alttext#

Now the iPod was ready to be reassembled:

#alttext#

Since upgrading the iPod, I’ve roughly filled half of it with music, and I’ve instantly noticed the benefits of having a CompactFlash-based iPod: file transfer is really fast, the battery appears to last more than before (I’m still testing, but in the last period with the 4 GB MicroDrive, battery life was quite poor), and the iPod remains cool. With the MicroDrive, the iPod started getting warm after a while; I don’t know if it’s normal for a MicroDrive to get warm or if that was a sign of imminent failure, but with the moving parts of a hard drive and the heat, it’s no wonder battery life was impacted. Now the situation is definitely better on this front, and I’m actually amazed that a 10-year old battery is still capable of holding such a charge.

Here are a few more photos. As you can see, the backlight is still very bright after all these years. Long live the iPod mini!

#alttext#

#alttext#

Added to the collection: quite the vintage package

My recent post A few About boxes from vintage Mac applications received a lot of attention, mainly because it was first linked by John Gruber at Daring Fireball, and was then mentioned by The Loop and by The Unofficial Apple Weblog among others.

It was completely unexpected, and amazing. The feedback I received — both in the form of public comments, mentions on Twitter, and especially private emails — made me giddy, and I wanted to thank every person who wrote me (I’m still answering emails after more than two weeks from the blog post).

Another unexpected by equally thrilling side-effect of this brief moment of Internet fame was that a few people, out of the blue, got in touch to donate a few things they saw I was looking for in my vintage wishlist. One particularly generous donor and splendid fellow has been Richard, who sent me a Christmas-worthy package, which arrived this morning. So, for the mere cost of shipping, this is what I’m going to add to my collection — which in my case means, here’s what I’ll be putting to good use as soon as possible:

PowerBook Duo 280c and DuoDock II

PowerBook Duo 280c, DuoDock II, plus a spare battery for the Duo.

As with the rest of the contents of the package, I was blown away by the excellent condition of these items. And most of all I am happy to already have a replacement for my poor Duo 280c which quietly broke down just less than two months ago. And it’s a better replacement, too. It has 40 MB of RAM and a 1 GB hard drive (my old Duo had 24 MB of RAM and a 320 MB hard drive). Unfortunately, the DuoDock II’s power supply doesn’t work, but a replacement may come sooner than later. I also found a spare battery, but it appears it doesn’t hold a charge. Instead the one in the picture, that came inside the Duo, appears to be working. I may have to reset the PowerBook’s power manager, though, because — just like my old Duo started doing at some point — the Mac boots up and works correctly on the AC adapter and with the battery removed, but as soon as I insert the battery, it abruptly shuts down.

 
Iomega SCSI ZIP 100 drive

Iomega ZIP 100 drive (SCSI version).

Again, I was amazed at finding everything in like-new condition. I love vintage packaging as much as the products, so it’s great to have everything in its original box. The SCSI cable included is also great to have, as I have more vintage Macs and peripherals than working SCSI cables. That floppy you see above the drive is to install the Iomega drivers on Windows/DOS machines. It’s still sealed, of course. I tested the drive by connecting it to my Colour Classic. At first the drive was only detected by SCSI Probe, but I couldn’t mount any disk without the Iomega Driver extension. I connected my PowerBook 1400 and copied the one I loaded there, but it was too new for the Colour Classic (version 6.x). Luckily there was also an older Iomega Driver 4.2 extension, and that was the right one. After a restart, disks were recognised, mounted, formatted without issues. I also noticed how quiet the SCSI ZIP drive is compared to my (more recent) USB unit.

And speaking of disks…

 
Lots of disks

ZIP 100 disks, three SCSI terminators, an Ethernet card (Apple branded), Apple rainbow stickers, two 88 MB SyQuest cartridges and a 230 MB 3.5″ magneto-optical disk.

Yes, those are thirty-three ZIP 100 disks. I guess that, together with the dozen or so I already have, I won’t be needing more ZIP disks anytime soon! That’s about 3 GB of storage space, and I can practically back up the contents of all the working vintage Macs I have. I also love those Iomega 6-disk holders — very practical and stackable.

I still have to check, but I hope I’ll be able to install that Ethernet card on the second motherboard (from an LC580) I use when I need to speed up things with the Colour Classic. Tomorrow I’ll also check those two nice 88 MB SyQuest cartridges.

 
Logitech ScanMan Model32
Logitech ScanMan hand-held grayscale scanner Model 32 for Mac.

This has been another great surprise. I remember wanting this manual scanner so bad back in the day, but could not afford it. Now, I know that scanner technology has rendered this product obsolete, but it may be a nice solution to quickly scan a few documents while I have my Macintosh SE or SE/30 set up. When I opened the box, I was surprised by that unit looking like an external floppy drive, and I thought that Richard had actually put one in the box, taking advantage of the perfect size of the cut-out. It turns out that it’s the necessary interface for the scanner, i.e. you connect the beige box to the Mac, and the hand-held scanner to the box. Also worth noting, that Mathematica demo floppy!

Like with the ZIP 100 drive, I love to own the original packaging of the Logitech ScanMan. So I took another photo of the back of the box, which I think it’s worth sharing:

ScanMan box


I can’t thank Richard enough for his kindness and generosity — a true gentleman. I shall put all these items to good use and take care of them in the best possible way: it’s the right thing to do to honour donations such as this.

A hard drive for the SE/30 — The long rescue

After the unexpected setback with the hard drive extracted from the Quadra 950, I once again rummaged inside a couple of boxes with stored assorted vintage stuff in search of a possible candidate. I found a few hard drives (both SCSI and IDE) in “I honestly don’t remember” conditions, so I took out three SCSI drives and put them in my external drive enclosure, connected to the Macintosh Colour Classic. The first drive, a 500 MB Quantum-something, made a few terrible clicks while trying to mount, and repeatedly failed. The second, a nice 9 GB Seagate ST39140N made a low humming noise when I powered up the SCSI enclosure, then silence. All the diagnostic tools at my disposal didn’t even detect its presence on the SCSI chain. The third, a surprisingly compact and lightweight 1.2 GB Quantum Fireball drive, powered up and made all the right little noises that indicate a possibly functioning hard drive. Also, it was immediately detected on the SCSI chain, and FWB Mounter gave me hope:

FWB Mounter

There it was, SCSI ID 4, “Recoverable”. And the adventure began.

I tried to mount it with FWB Mounter, but mounting failed after two long minutes during which the Mac appeared completely frozen. I launched FWB Hard Disk Toolkit 2.5, but the result was the same. My initial approach, I have to say, was to try to read and/or salvage any useful data stored on the drive before attempting a reformatting. Then I remembered I had a CD-ROM with a copy of DiskWarrior for the classic Mac OS (version 2.1, I think), so the fastest route was switching to a Mac with both a CD-ROM drive and a SCSI port. The PowerBook G3 Lombard was at hand, and fit the criteria. I booted in Mac OS 9.2.2, launched DiskWarrior, but it didn’t even detect the Quantum hard drive in the SCSI enclosure. I rebooted in Mac OS X Tiger and tried DiskWarrior 3 under Mac OS X. Same result. I rebooted again in Mac OS 9.2.2 and launched Disk First Aid, which did detect the drive but gave up almost immediately during the verification process, saying something along the lines of “This disk has too many errors and I can’t repair it.”

Since I still have all my Compact Macs out these days after performing a general check-up on them, I took the Macintosh Classic, connected the SCSI drive enclosure to it, and launched Norton Disk Doctor. At first, it didn’t detect the Quantum drive, but after issuing the “Show Missing Disks” command, the drive showed up. Clicking on Examine started a very long process where Norton Disk Doctor appeared to be running in slow-motion. After twenty minutes with the progress bar in the “Checking for bad blocks” test that was not progressing, I skipped the test (as soon as the Mac registered my input). When it came to checking the drive’s directory structure, Norton Disk Doctor kept throwing alarming errors. It indeed tried to fix a few issues, but I was starting to get the feeling that whatever had been on that drive was irrecoverable.

From that point on, I dropped any attempt to diagnose or repair the drive and focussed on actually trying to format and mount it.

On the Macintosh Classic I have an older version (1.8) of the FWB hard disk utilities, so I launched HDT Primer and see what it could do. HDT Primer recognised the drive and let me perform a low-level formatting, warning that the operation would take 81 minutes. I let it work and went to my studio to take care of other business. When I returned to the living-room after about an hour, HDT Primer was already done, and a dialog box informed me that the hard drive had been successfully formatted. So I went and tried to initialise/partition it, but unfortunately I kept getting errors.

Another frustrating chapter was beginning: trying different applications (on different Macs) to create partitions and logical volumes on the disk. Since I knew that that Quantum Fireball drive had bad sectors, I figured that the best course of action was attempting to partition it in different ways, so that maybe I could at least get to a point where, say, two out of three or four partitions were in a good-enough state to be mounted as volumes. After many, many fruitless efforts, and with Apple’s Drive Setup being this close to succeeding, my friend Grant Hutchinson suggested I tried using Silverlining Pro. I looked in my archives and found an old copy of Silverlining, then a newer one (Silverlining Pro 6.1). Thanks to Silverlining Pro 6.1 I could install a proper driver on the drive and managed to create two partitions of roughly 600 MB each; then, with version 6.5.8 I was finally able to initialise and mount one of those partitions.

I then used Norton Disk Doctor again to see whether such partition was good enough — and again, the “Checking for bad blocks” test was taking an inordinate amount of time, so I skipped it, assumed there were bad blocks, and let Norton perform the remaining tests. The disk passed them all, and knowing that the directory structure was sound was enough for me. With the disk now mounted on the PowerBook 1400’s desktop, I carried out some informal tests of my own, copying files to and from the partition (which I simply called “Q1”), launching applications from Q1, unmounting and mounting Q1 several times, and so forth. All went well, and I was actually surprised at seeing how fast this drive is in reading/writing files. Again, thanks to Silverlining Pro I was able to instruct the drive to mount automatically the Q1 partition when connected. Then I powered off the SCSI enclosure, disconnected the drive, changed the jumper configuration so that the SCSI ID was 0 instead of 4 (as it should be for an internal drive), opened the Macintosh SE/30 and mounted the Quantum Fireball hard drive on the metal shelf.

Drive inside the SE30

As you can see, the Quantum Fireball drive is rather slim (just so you have an idea: the former 40 MB beast of a hard drive that was inside the SE/30 weighed 850 grams, this Quantum Fireball weighs less than 250 grams).

I closed the SE/30, connected it to the mains, and turned it on for the moment of truth.

Silverlining

This, appearing at startup, was comforting. Then of course I got the floppy icon with the flashing question mark. Normal, since there wasn’t yet a valid system software installed on the drive. So I took the original set of floppy disks for System 7.0 and inserted the first one. After choosing a System 7.0 installation tailored for the Macintosh SE/30, it was time to see whether the Installer would recognise the Q1 partition… and it did! Once installation was complete, I restarted the SE/30 and it booted into System 7 in roughly 20 seconds. I was amazed and also very happy that my efforts and the time spent on this hadn’t been a complete waste…

Q1 mounted

So now the Macintosh SE/30 has a working-enough hard drive. Of course, it’s a temporary solution (the drive has a fair amount of bad sectors), but for now it’s usable, and even if I cannot take advantage of all the original 1.2 GB of storage space, a 620 MB partition for this system is far more than enough.

Careful with that Quadra drive

When I was talking about my Macintosh SE/30 in the previous article, I wrote:

The SE/30 is the most powerful and expandable of the Compact Macs I have, and I plan to do what I can to keep it in operation. At first I thought I had no useful hard drive substitute, but then it occurred to me that since my Quadra 950 isn’t currently working, I could transplant the Quadra’s internal hard drive (a 400 MB unit) into the SE/30, so I can still use the SE/30 and put an otherwise idle hard drive to work at the same time. A bit of a win-win situation.

Yesterday I did the hard drive transplant, and the outcome was, well, unexpected to say the least. But I think I’ve learnt something that’s worth sharing.

Here are two photos of the hard drive that was in my Quadra 950:

Quadrahd1.jpg


Quadrahd2.jpg

It’s a 400 MB Seagate ST1480N manufactured in 1991 at the latest. This drive has the same imposing size as the 40 MB Quantum ProDrive in the Macintosh SE/30, but I had to be a bit creative when mounting it on the drive shelf, because the side holes were located in different places and I couldn’t insert the screws in the same way as the previous Quantum drive that was inside the SE/30. Long story short, the procedure took me longer than expected, and when I finally reassembled the Macintosh SE/30, connected the mouse and keyboard, and connected the Mac to the mains… It didn’t turn on.

My first thought: Unbelievable… Is the power supply gone? Now? I was really bummed, for that was surely the worst timing ever. I honestly wasn’t blaming the hard drive because in all these years dealing with vintage technology (and back then, when it was current), I had never encountered an instance where a drive was preventing a Mac from even turning on. And I was sure I didn’t touch anything on or near the power supply circuitry. Still, there were no strange smells coming from the Mac, and that was kind of a positive sign. I opened up the SE/30 again, removed the hard drive, closed the SE/30, flipped the power switch again… And it booted just fine.

It was the drive, then. But how could that happen? It really was a first for me. Intrigued, I inserted the drive in the external SCSI enclosure I keep handy, and guess what? It didn’t turn on either (the power LED was just flashing, and no sounds came from the enclosure). Maybe there was something to change in the drive’s jumper configuration, but a quick check revealed that all was OK in that regard.

On a hunch, I went digging in my personal archive of Apple Service Source Manuals in PDF format. There was a document, downloaded from the Web not long ago, with the promising title Hard Drives. I opened it, and I found something interesting in a section called Drives in Quadra 900/950:

hdmanual-1.png
hdmanual-2.png

As you can see from the two figures, it appears that you have to ‘prepare’ a drive to be used inside a Quadra 900/950, by removing the terminator resistors. If you look at the second figure, those terminator resistors can be reapplied in case the hard drive has to be repurposed in another Mac or external enclosure (at least on the 400 MB model). I’m out of luck, though, because the 400 MB Seagate drive I have here was either part of the stock drives my Quadra 950 originally had, or it was prepared by the Quadra’s previous owner.

resistors-removed.jpg

The bottom line is that, in its current configuration, I can only use this hard drive in my Quadra 950 and nowhere else, and the Quadra isn’t working at the moment. That’s disappointing, and also a waste, since the drive works — well, it worked the last time I used the Quadra.

If you’re parting out a Quadra 900 or 950, keep this in mind in case you’d like to use one or more of the Quadra hard drives in another Mac. You also might acquire a Mac that doesn’t turn on: disconnect the hard drive and try turning the Mac on again. Maybe the previous owner put a drive that came from a Quadra thinking that it just was interchangeable. Not a likely scenario, but it’s rather quick check to perform, just in case.

This is what I’ve been able to ascertain from my tests and (limited) research, and I hope it helps. But if something I wrote is incorrect, or your experience is different, please let me know. Thank you.

Let’s talk backup

As of late, I’ve been suggesting a few great applications that are still available for PowerPC Macs (where by ‘PowerPC Macs’ I generally mean ‘PowerPC G3/G4/G5 Macs running Mac OS X’). For this article I thought I could gather a few resources and reading material related to the essential practice of backing up data.

A necessary preamble: up to the advent of Mac OS X 10.5 Leopard in October 2007, my personal backup strategy was a selective, manual backup of all the data I considered vital, so I never really used any tool to perform automated backups, therefore I don’t have any real direct experience with some of the applications mentioned below. The majority of them have an impeccable reputation, though, so I guess they’ll be useful to you.

Backup tools for PowerPC Macs running Mac OS X (and Mac OS 9.2.2)

  • If you’re running Mac OS X 10.5 Leopard, don’t forget that a basic backup tool is built in the system itself: Time Machine. I started using it since I upgraded to Leopard and I’ve never lost a backup. Considering a few horror stories I’ve heard, I may have been lucky. My only bit of advice: let Time Machine do its job, no matter how long it takes. I never interfered, nor tinkered with it, and never had a problem.
  • Carbon Copy Cloner — A great tool to clone disks and make bootable backup copies of them. And this is just one of the many features this application offers. You can download version 3.4.7, which is compatible with Mac OS X 10.4 Tiger and 10.5 Leopard from this download page.
  • SuperDuper! — I have actually used SuperDuper! and it was extremely helpful in a few key circumstances. I like its interface because it really guides you every step of the way and explains what the app will do according to the options you choose. The links to download older versions of the app are provided in the sidebar of the page I’ve linked to. There are versions for Mac OS X Leopard, Tiger, Panther and even Jaguar. Customer support is fantastic. One thing worth quoting from SuperDuper’s page is this bit: Please note that SuperDuper! is not designed to back up to CDs, DVDs or Tape, and needs a location (other than the boot volume) to store the backup – typically a volume on an internal or external (FireWire) drive. SuperDuper! only copies HFS+ (Mac-native/Mac OS Extended) volumes.

SuperDuper’s developer offers another important reminder. Old-time Mac users know this already, but it may be useful especially for those who are discovering vintage PowerPC Macs only now:

Note also that USB drives do not allow booting Power PC based Macintoshes under any version of Mac OS X: this is not a SuperDuper! limitation, but one of the OS. If you would like to boot from a backup stored on an external drive, and have a Power PC based Mac, please purchase a Mac compatible FireWire drive. Intel Mac users can boot from either USB or FireWire drives.

  • Dantz Retrospect — Probably one of the backup applications for the Mac with the longest history. This is commercial software, and a licence is required even for older versions. Explore the Retrospect website and see if such software meet your needs. Older versions of Retrospect (for Mac, Windows, Linux) can be found at this page. I never used this product, but heard much praise for it over the years.
  • SilverKeeper — A free utility that used to be made available by LaCie. If you look for it on the Web, you’ll probably find the newer 2.0.2 version (for example on MacUpdate), which requires Mac OS X 10.3.9 or later. I have made available for download the older 1.1.4 version which supports Mac OS X 10.0 to 10.4 and can also be used under Mac OS 9.2.2. It’s a Zip archive of the SilverKeeper installer and related documentation. Let me know if you have problems extracting it.
  • SimpleBackup — I found this little utility by chance. It may be a simple solution for even older Macs. The developer calls it a “Finder alias-based backup utility.”

    In the readme file he explains how the application works: SimpleBackup is a very simple and easy to use file backup utility. I wrote it because I wanted a quick-and-easy way to back up all those files that are spread out over the hard disk, in the preferences folder, in the documents folder, certain folders and files in the applications folder, etc… I decided that I didn’t want to write a user interface for the utility, so I got the idea of letting the Finder do the work for me by using aliases. The result is a backup program that is actually easy to use! You simply navigate through your hard disk and find the files or entire folders that you want to backup that are buried in the System Folder, Applications, Documents folders etc., and tell SimpleBackup about those files/folders by using aliases.

  • SimpleBackup website (There are other interesting utilities you may want to check out there. The website is old, but the links appear to work.)

Some reading material

I think that this four-part essay on backups by Adam Engst is still worth reading and saving. It was written in 1998 but it’s full of essential pieces of advice and links to other backup software I haven’t mentioned here.

Check also this other piece by Adam Engst, written in 2001: What About Backing Up to FireWire Hard Disks?

This is a start to help you find some backup solutions and ideas, but feel free to chime in and share your suggestions/experience in the comments. Thank you!

30 years of the Mac: peripherals

These days of celebration of the Mac’s 30th anniversary really had a deep ‘going down memory lane’ effect on me. Coincidentally, I was doing some major cleaning in my studio, and I found some things worth scanning. To avoid posting just a bunch of photos and images, I’ll try to make a series of posts, separating my findings in a more coherent way.

First off, I found a great book I thought I had lost when I relocated: The Graphic Designer’s Basic Guide to the Macintosh, Written by Michael Meyerowitz and Sam Sanchez. The book was published in 1990, and it’s full of very nice photos of Macs and peripherals of the time (too bad the photos are black and white, and not colour). Instead of focusing on the various Mac models portrayed therein — nothing really new to the vintage Mac enthusiast — I thought I’d scan and publish here a few images of interesting peripherals (monitors, printers, etc.). I’m doing this for ‘educational’ purposes and I hope the copyright owner will consider this fair use of the images.

Apologies for the quality of the scans. The original photos weren’t much better. I also scanned the captions, which should be perfectly readable, but I’ve transcribed them anyway just in case. I’ve also added links with additional information where possible.

Apple CD SC
The Apple CD SC is a front-loading disk drive that reads information from specially formatted compact disks. One compact disk can hold an entire encyclopedia.


Apple monitors
Apple monitors for the Macintosh II, IIx and IIcx. They include a 13-inch Apple Color RGB monitor, a 21-inch Apple two-page monochrome monitor, a 15-inch Macintosh portrait display monitor and a 12-inch monochrome monitor.


Bernoulli
The Bernoulli Box is one of several cartridge systems that stores information on a removable disk.

Further reading: The Bernoulli Box A220H


Linotronic
Linotronic laser imagesetters produce professional-quality text, line art and halftones on film, paper, or press-ready plates. The Linotronic is one of several high-end machines that can be used to produce camera ready layouts.


Montage FR1
Presentation Technologies’ Montage FR1 film recorder with optional TC1 camera back for creating overheads and instant prints of work created on the Macintosh.


Original Mac  accessories
The original Macintosh with mouse and keyboard. Add-ons included the ImageWriter dot matrix printer, external disk drive, numeric keyboard, a modem, and carrying case.


QMS ColorScript 100
The QMS ColorScript 100 color laser printer. Although expensive, color laser printer technology is moving forward rapidly and prices are starting to drop.


ScanMan SE
A ScanMan hand-held scanner by Logitech for the Macintosh Plus, SE and II. Hand-held scanners are inexpensive, easy to use, and provide a quick way of scanning small pieces of artwork.

Watch an edition on scanners from the TV programme Computer Chronicles, made available by the Internet Archive. Originally broadcast in 1991. (30-minute video)


SE30 Radius
Radius two-page monitor for the Macintosh SE/30. The obvious advantage of this size monitor is its ability to display a double-page spread at actual size.

Further reading: Radius Full Page Display at 32by32.com


Thunderscan
An inexpensive scanning option: Thunderscan replaces the printhead of the Apple ImageWriter with an electronic eye that reads the image as it rolls through the printer’s paper-feed mechanism.

Further reading: Andy Hertzfeld on the Thunderscan at Folklore.org

Putting my Data Retrieval service to the test

Almost a year ago, I started (tentatively) offering a new Data Retrieval service. It went basically ignored for many months — which surprised me a bit, since the two main reasons that led me to offer this kind of service were (1) keeping my vintage hardware rolling, putting it to good use, and (2) because I kept hearing people complain about having stuff on old devices and media and being unable to retrieve it. (As a somewhat bitter aside, I was not surprised to notice a lack of interest for a project of mine: it seems to be a recurrent pattern in my online presence.)

But lately things have started moving, and so far I’ve successfully helped three people, either by extracting their data from obsolete media, or by converting data written by obsolete applications into something readable by more modern software.

Success story #1
Giuliano, an “avid reader of my blogs” as he wrote in his letter, is an Italian graphic designer who recently relocated in France, and after settling in his new home, he found a box of old stuff from his early days in his profession. Most of that stuff was on Iomega Zip disks, and he was able to retrieve it by borrowing a USB Zip drive from a friend. But then he found a couple of SyQuest 44 MB cartridges, and that proved to be a bit trickier, so he sent them to me to see what I could do.

The disks needed minor repairs, nothing that the old Norton Utilities 3.2 and FWB Hard Disk Toolkit couldn’t handle. For the data retrieval I used my SyQuest 5200c unit (that reads 44, 88 and 200 MB cartridges) connected to the Power Macintosh 9500/132; the files, mostly old Photoshop projects, were transferred directly to my MacBook Pro via Ethernet and made available for Giuliano in my Dropbox public folder. It was thrilling to see file creation dates such as October 1995 and January 1996 (it’s safe to assume that they were Photoshop 3 files), but even more thrilling was the moment in which I could open them and realise they were still fine and readable (I asked Giuliano permission to verify the data before making the files available for him).

Success story #2
This was, admittedly, a rather trivial affair. Stewart, another reader of this blog, wrote me asking for assistance in converting a bunch of old DocMaker files into something he could read again. “These were e-zines I created with another guy back in the Nineties. We uploaded them in my FTP server and then time went by and we kind of forgot about them. One day I was doing some spring cleaning in the archives and bam! I was back to memory lane. But since neither I nor my friend have old Macs now and our Intel Macs don’t run OS 9 or Classic, at the moment I have no way of reading that stuff. I realized it has sentimental value — it’s fine if you can’t give it back to me in a pretty state, I’m mostly interested in being able to read it.”

Stewart gave me access to his FTP server, and four years of e-zines were waiting for me — almost 50 files. Since Stewart was just interested in reading the contents, I figured the quickest way was to convert them in PDF format. There is no DocMaker-to-PDF utility that I know of, but I used PrintToPDF on my G4 Cube under Classic and got the job done. (As the name suggests, PrintToPDF is a printer driver that creates PDF files. It works in the Classic Mac OS only, or in the Classic Environment under Mac OS X, and you select it as the default printer in the Chooser; then you can ‘print’ PDFs from any application.) Sometimes a page break cut graphic elements in two, but the result was readable and that was the main goal. I uploaded the PDFs back on Stewart’s server and he was happy, and that’s the most important thing.

Success story #3
Nicola sent me a file, presumably generated by an old version of ClarisWorks a few years back, and containing a series of photo references. It didn’t contain any images, just (as I discovered in my investigation) a long array of records with descriptions of where the photo was taken and what was on the photo. It looked like a temp file, and when I opened it with a hex editor it just looked full of garbage. My first idea was to use AppleWorks to open or import it, but I didn’t have much luck; then I thought about FileMaker. So I fired up my old copy of FileMaker Pro 6 which, to my great satisfaction, found the file readable and offered to update it in a more recent format. It ended up perfectly usable in the end.


These little experiences made me realise once again the importance of so-called obsolete technology. When new media and new formats arrive, we have to keep up with them and constantly transfer our digital archives on up-to-date devices and media, but sometimes we haven’t got the time, the opportunity, or simply the level of organisation needed for the task — especially as our archives keep getting bigger. So, every now and then, something doesn’t get updated, gets lost in a move, or simply the machine where it was created stops working (or the operating system or the application gets updated and doesn’t offer enough backward compatibility) and data or media become ‘orphans’. That’s where vintage hardware comes into play.

There may be some plan to expand this kind of service in the future, so that it can definitely come out of the current ‘beta’ state, so stay tuned!